Showing posts with label Eye makeup. Show all posts

Thursday, 24 April 2014

Everyday Smokey Eyes Look - FOTD


Hiya everyone! I just realized that there has been a spate of product reviews on the blog but I've not shared any makeup looks or tutorials for a really long time. Well, I'm gonna change all that and promise to mix things up here so that you don't get bored!

Read on to see what this look is all about!

Monday, 10 March 2014

Swatches of Six Sephora 12Hr Wear Waterproof Jumbo Liners

Sephora 12Hr Wear Waterproof Jumbo Liners

My love affair with the Sephora 12Hr Wear Waterproof Jumbo Liners started in April 2013 at Delhi's Sephora. The SA at the store insisted that I try out one when I was checking out the eye pencils. I was looking for a pitch black liner and when I swatched it, was spellbound by the texture and pigmentation. Since then, I collected three of these pencils in black, purple and green and I always wanted more. So what did I do when I landed at the Sephora store in Ion Orchard Singapore? Went to the counter where these pencils were displayed and picked up six of them! I actually wanted to get all but my wallet did not permit me at that time but I'm definitely getting the rest very soon.


These jumbo pencils double as eyeliners and eye shadows and they are available in matte as well as glitter/shimmer finishes. NYX and a lot of international and Indian brands like Lakme does jumbo eye pencils too but the Sephora ones are my favorite. They are incredibly soft, very well pigmented and actually last for more than 12 hrs. In Delhi, I think they are priced at Rs 680 unless the price has increased now. If you go to a Sephora store, these pencils are a must buy. Believe me they are this good! The only problem is that they are not retractable so you do need a big sharpener. I picked up the shades Electric Blue Matte, Kaki (that's the spelling!), Brown, Purple Glitter, Marine and Dark Taupe Shimmer. Here are the swatches of each of them..


From L - R - Electric Blue Matte, Brown, Dark Taupe Shimmer, Marine, Purple Glitter, Kaki

Which color did you like the most? Do share in the comments below.


Wednesday, 9 October 2013

The NEW SMOKEY EYE: Bobbi Brown Long- Wear Cream Shadow Stick


Long- Wear Cream Shadow Stick

Long-Wear Cream Shadow Stick is designed for the modern woman on the move. Just swipe it on and go—it’s that easy.” –Bobbi Brown

Effortless and high impact—that’s the essence of NEW Long-Wear Cream Shadow Stick. This do-it-all formula glides on tug-free and can be used to shade, define, smoke up and highlight eyes. In subtle to eye-popping shades that last for up to 8 hours without creasing, flaking or fading, it’s a stroke of genius.


How it Works

Exceptional Wear, Intense Color
A unique blend of oils, waxes and film formers, gives this water-resistant formula superior 8 hour wear. Color rich emollients provide intense pigment in one easy swipe without flaking or creasing.

Supremely Smooth, Lightweight Feel
Antioxidant Vitamins C and E protect the delicate eye area while skin conditioners help create a smooth, comfortable and lightweight feel that is not oily or tacky.

Available in 8 Shades: Vanilla, Golden Pink, Sand Dune, Iced Blue, Forest, Shadow, Bark, Violet, Plum

Thursday, 12 September 2013

A Guide to MAC's Eyeshadow Finishes

I must admit that I was never an eye shadow girl. Even though I did buy them, I was never too enthusiastic about eye makeup and more interested in adding lipsticks to my stash. Recently though and maybe it's all because of blogging, I have discovered a passion to collect eye shadows. I started off with buying Sleek's i-divine palettes (which are awesome) and now veering towards getting some MAC. We all know that MAC has a mind boggling array of eye shadows and in the store, it can get a bit overwhelming with all these shades and on top of that the different finishes. I was quite ignorant of the difference between all these finishes till some time back but I did my R&D and here I am sharing with you my knowledge. A lot of you might know much more than me but a lot of you might not. So here's a short guide to the different MAC eye shadow finishes with examples of some popular shades to give a better idea.

Pic courtesy : Google Image

There are seven finishes :

1. Frost - these have fine shimmer that give a shining iridescence finish. The best thing about the Frost eye shadows are that they are shimmery but does not have an overdose of glitter. The con is that not all shades are very pigmented. Some examples of Frosts are Sable, Satin Taupe, Amber Lights, Bronze, Ricepaper, Humid etc.

2. Lustre - avoid these if you are not a fan of glitter coz that's what they have in plenty. Typically these are dry, have chunky glitter and a lot of fall out. Examples are Greensmoke, Honesty etc.

3. Matte - These have no shimmer, glitter or sheen. Mattes are a hit and miss. Some can be excellent and very pigmented while others, specially the LE ones can be really dry. Some of the good mattes are Swiss Chocolate, Soft Brown, Carbon etc.

4. Matte² - These are known as Matte Squared and the difference between these and Matte ones is that Matte² shadows have a buttery texture with very good color payoff. Some people however find these hard to blend. Examples are Blanc Type, Copperplate, Handwritten etc

5. Satin - Satin eye shadows also vary in finish. Some can be totally matte while some are frosty. Majority of them are semi-mattes with a subtle sheen. If you are looking for an eye shadow that is halfway between a matte and a frost, check out the Satins. Examples are Shroom, Cork, Folie, Club etc

6. Veluxe Pearl - These are probably the most loved because of their finish and texture. They are similar to Frost but with a more metallic shimmer. They are very smooth, easy to blend and most of them are well pigmented. Some of the popular ones in this finish are Woodwinked, All that Glitters, Coppering, Antiqued, Expensive Pink etc

7. Velvet - These are a mix of matte and semi-matte  some with a hint of shimmer and sparkle while some have glitter in them. Examples are Trax, Sketch, Mulch etc.

Hope you find this post useful and can choose your next MAC eye shadow wisely. Let me know if I have missed out on anything.

Which is your favorite MAC eye shadow finish? 

Monday, 9 September 2013

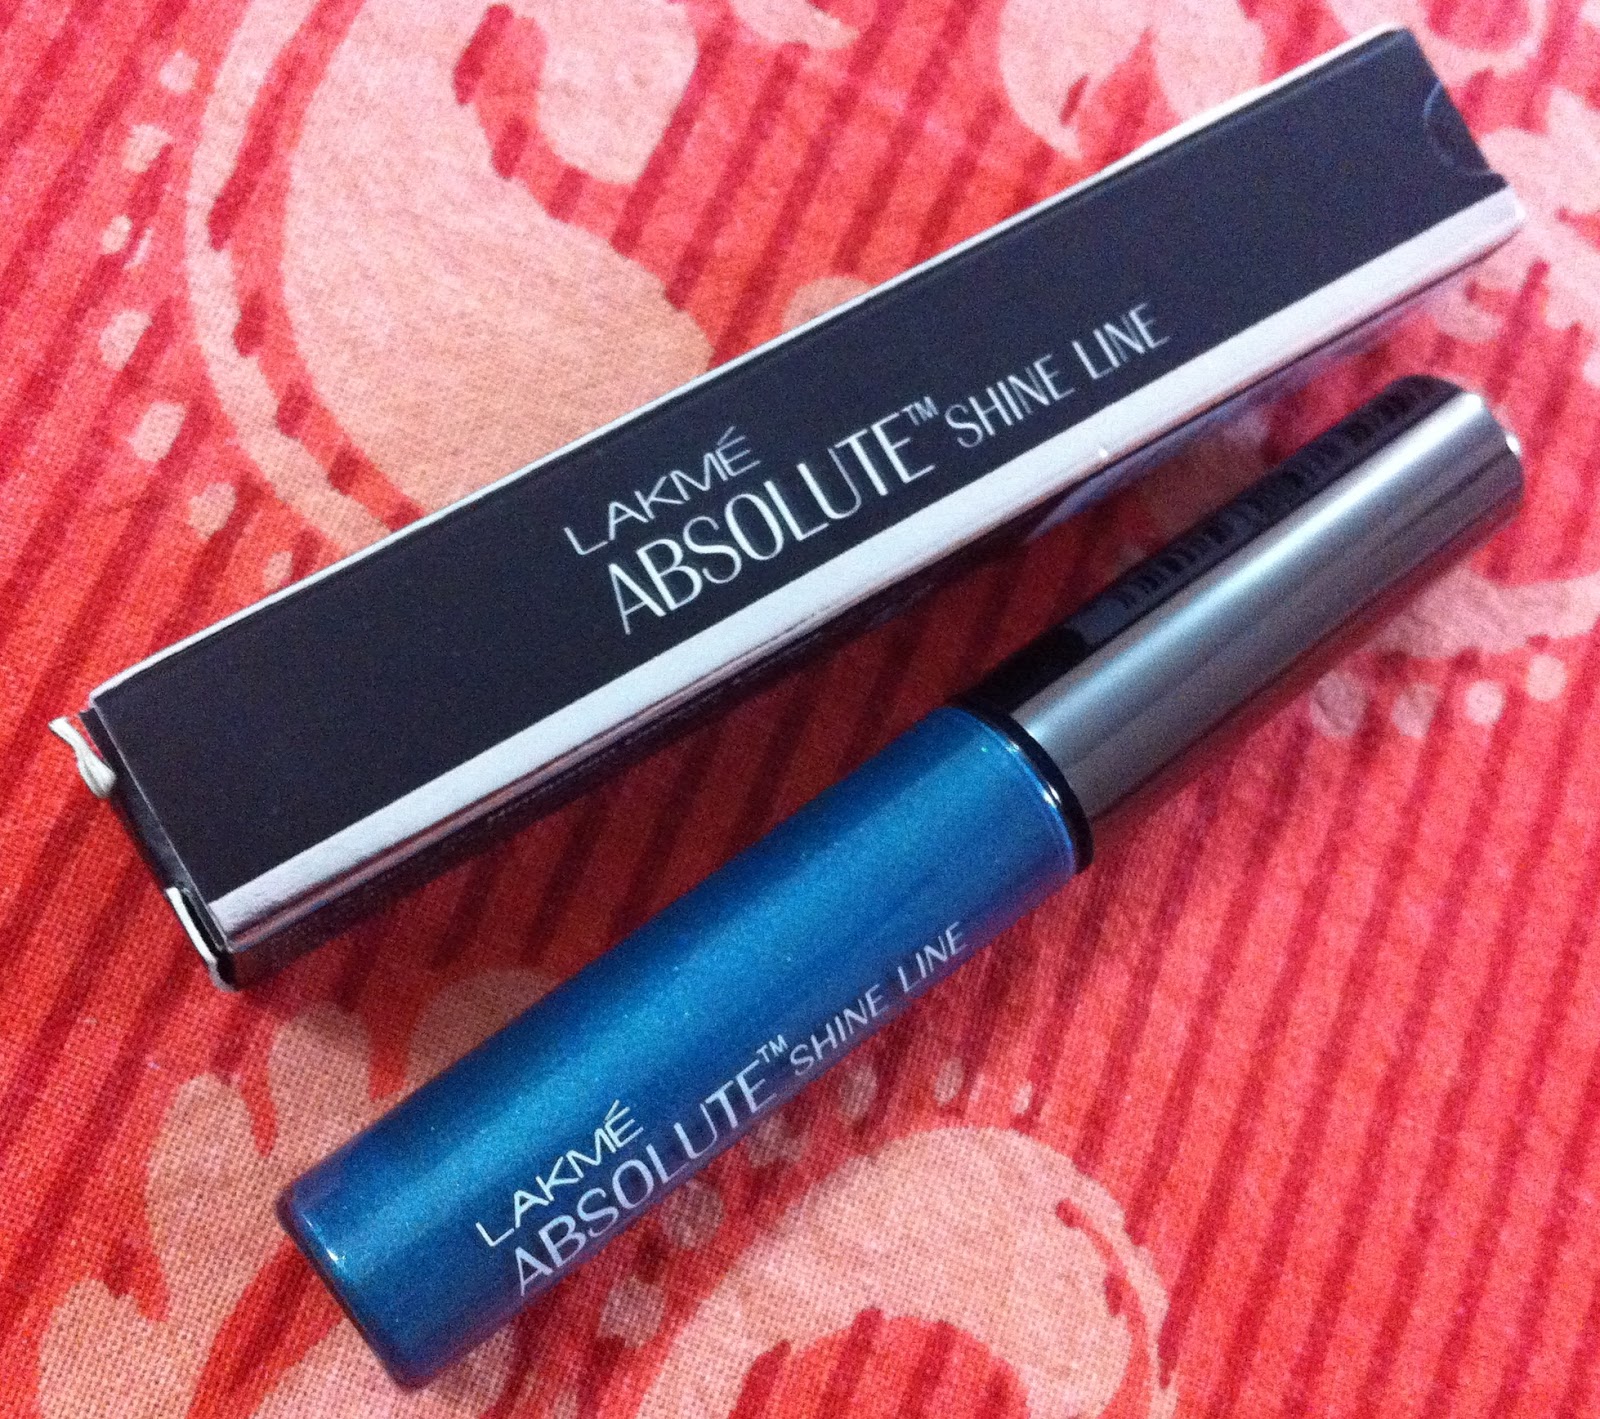
Lakme Absolute Royal Collection Shine Line Eyeliner Teal - Review, EOTD

Every year Lakme launches a winter makeup collection post Lakme Fashion Week and for 2013 it is the Absolute Royal Opulence Collection by the celebrated designer Sabyasachi Mukherjee. Inspired by royalty, the glamorous limited edition range consists of creme lip colors, nail colors and shine line eyeliners in pink, golden, olive, teal, blue, bronze and black. All the shine line eyeliner colors are really pretty but the two that stood out for me were teal and blue and I picked both. I'll talk about Teal in this post.


The packaging is the standard shine line eyeliner one with a very thin brush inside. The brush is great to get a very precise line and for a cat flick but my main problem with the brush is that it is too thin to catch a lot of product. It's so thin, you can't even make out the bristles.Once you start lining the eyes, less than half way you will find that the brush has lost color and you will have to go back and get some more. I like the line on my lids to be slightly thick so you can imagine how many times I had to dip the brush in the tube to get the desired color and thickness. 


The formula of the liner feels very thin and watery but it is thankfully not the same on the lids. It dries up pretty fast and the staying power is good too. I get around 8-9 hours out of this without smudging and the shimmer landing all over the face. 

Teal is a gorgeous bluish green with more of blue in it and shimmer. Definitely a striking color which will go very well specially with fair to medium skin tones. I love the color and pigmentation and have no complains. What I will complain about is the actual finish of this liner. I hate how it looks after application! Once the liner dries, it starts to crack on the lids and it looks like I've got wrinkles. I like the 'crackle' effect only on my nails so this is the area where Teal fails miserably for me.


I kinda feel bad for Teal though. It had so much promise - a gorgeous color, good pigmentation, excellent staying power, reasonable price but the area where it's performance should have mattered the most, its a 'royal' failure. I have not tried the Blue one yet and I really hope it does not turn out to be the same as Teal.

Shall I recommend this? No. But if you really like the color and the other pros, check it and test for yourself before spending Rs 290. 

Have you tried anything from the Lakme Absolute Royal Collection?

Friday, 2 August 2013

Glam up your eyes for every occasion with FACES Cosmetics

Eyes being one of the most important features of the face, it requires the same importance while doing your makeup. So let your eyes attract all the attention in the coming party season. Bring perfection to your makeup by beautifully done eyes with FACES cosmetics.


  • Start with applying a thin coat of Eye primer from your lids all the way up under your eyebrow, it really helps give your eye shadow staying power.
  • With the lightest shade of eyeshadow, cover both eyelids.
  • Depending on your look choose from a medium to darker shade of eyeshadow and start working at the very top of your lid and sweep across. This is in the crease area of your eye, and should be barely visible above the crease. Blend with a finger or sponge.
  • Moving on to the lightest shade of eyeshadow, sweep from the crease all the way up under the eyebrow. As with the previous shade, blend with a finger or makeup sponge.
  • Add eyeliner on the top lids. If you use dark or liquid eyeliner, you can blend it into the bottom lid for a smoky look. If you have large eyes, line below the eyes as well.
  • Complete your eyes with nice volume mascara. You can add multiple coats for thick, dramatic lashes and then use FACES eyelash curler with soft cushion edges to lengthen lashes if desired.
Choose from the following to achieve the glamorous party ready perfect eye makeup.

Eye Primer

FACES Eye primer: Rs 699

Eye Shadows

FACES I Shine quartet: Rs 599

Glam on Eye shadow Mono: Rs 249

FACES Eye shadow Duo: Rs 399

FACES Vivid Hues of Sky makeup kit: Rs 499

Eye Liner

FACES Beyond Black Eyeliner: Rs 599

FACES Ultime Pro Shine on Eyeliner: Rs 699

Mascara

FACES Ultime Pro Shocking volume Mascara: Rs 799

FACES Ultime Pro Gel waterproof mascara: Rs 799

Eye lash curler

FACES Eye lash curler: Rs 149


AVAILABLE AT: 

FACES Canada, GK 1, M Block Market, New Delhi

FACES Canada, Infinity 2 Mall, 230/ 2nd Floor, Linking Road, Malad (West) Mumbai -400


Friday, 29 March 2013

Simple and Easy Glam Eye Makeup Look - Tutorial

In my first ever makeup semi-tutorial on the blog, I showed you how to do a very simple and easy everyday makeup look that can double up both for day as well as night wear. I used the technique of first applying a lighter eye shadow shade on the lids and then with a fluffy brush lightly running over the crease with a darker shade and blending it in. In today's tutorial, I will show you another easy way of doing up your eyes. The products remain the same but the colors change to silver and black. This is an ideal look for the night but the great thing is that it's subtle enough for the day as well. Lets get started..


List of Products Used:

1. Kryolan TV Paint Stick - used as base
2. MUA Undress Me Too Palette - using the colors Exposed (highlighted in red) and Corrupt (highlighted in blue)
3. Coastal Scents Fluffy brush - from the 22 pc brush set
4. Rimmel Soft Kohl Kajal Eyeliner pencil - for the waterline
5. Maybelline Hyper Sharp Liner 
6. Rimmel Extra Super Lash Mascara


Here are the Steps:

1. Apply the TV Paint Stick all over lids. This works great for me as a base but you can use any eye primer/paint pot/concealer.
2. Apply the lighter shade all over the lids till the crease using a fluffy brush. In this look, I've used Exposed, a shimmery silver color
3. Now take the darker color and lightly draw an inverted C shape at the outer corner of the eyes using the same brush. I've used Corrupt, a matte black shade. Another alternative is to lightly just dab on a bit of the dark color at the outer corners and then blending it in. Make sure you don't take a lot of color on the blush or else it will be very difficult to blend and remember black is quite tough to work with. Start off with very little and if you want the look to be more intense, then you can build on it. Blending is the key to achieving this look and this is where the fluffy brush comes in handy. There should not be any harsh lines but the two colors should be differentiated. The lighter shade on the lids and the hint of black at the outer corners.
4. To add more definition, you can also line your crease with another dark color and blend it in but here I've skipped it and just stuck to two colors. 
5. Line your eyes with an eye liner or you can also use kohl or eye pencil. I used Maybelline's Hypersharp liner to line the upper lids.
6. Apply kajal on the waterline.
7. Apply 2-3 coats of mascara.
8. You are done!


What do you think of this look? Would love to get your feedback :)

Thursday, 28 March 2013

Simple Everyday Neutral Eye Makeup Look - Tutorial

Hiya Pretties, hope you all had a wonderful and very colorful Holi. If you've had an overdose of colors, then  this post is for you coz it's all about going neutral/nude. This is my first ever eye makeup tutorial (well kinda) on the blog so pleaseee be kind. It's not that great but I just wanted to show you how I do up my eyes for office nowadays specially when I just about have 10 mins to finish my entire makeup.


This look is extremely simple and can be done by anyone. I know a lot of people who get super confused while dealing with plenty of colors on the eyes. One color on the lids, one on the crease, outer v, inner corner etc etc. No doubt a mix of colors look fantastic but you also need to practice in order to get everything right. This, you can probably even do blindfolded and the overall effect is really neat and polished. Your most important tool for this look is a good blending/fluffy brush. I'm using the MUA Undress Me Too Palette because this is a neutral eye look but you can use anything as long as you get the blending right. All you need are two colors - a light and a dark one.

List of Products Used:

1. Kryolan TV Paint Stick - used as base
2. MUA Undress Me Too Palette - using the colors Fiery (highlighted in red) and Obsessed (highlighted in blue)
3. Coastal Scents Fluffy brush - from the 22 pc brush set
4. Rimmel Soft Kohl Kajal Eyeliner pencil - for the waterline
5. Maybelline Hyer Sharp Liner (forgot to include in the pic!)
6. Rimmel Extra Super Lash Mascara


Here are the steps:

1. Apply the TV Paint Stick all over lids. This works great for me as a base but you can use any eye primer/paint pot/concealer.
2. Apply the lighter shade all over the lids till the crease using a fluffy brush. In this look, I've used Fiery, a metallic copper shade
3. Take the darker shade and lightly outline your crease and slightly above using the same brush. I've used the shade Obsessed, a deep chocolate brown with light shimmer. Don't take a lot of it coz then it will be difficult to blend. You only want to show a hint of the color. Using the fluffy brush now blend it well so that there are no harsh lines.
4. Line your eyes with an eye liner or you can also use kohl or eye pencil. I used Maybelline's Hypersharp liner to line the upper lids.
5. Apply kajal on the waterline
6. Apply two coats of your favorite mascara
7. That's it. You are done!


Isn't it really simple? Perfect for eye makeup beginners and those going in for a fuss-free everyday makeup look.

Do let me know what you think of it. Will be waiting to know :)

Till next time..

Asta La Vista!